

In the modern home, “connectivity” is the default. We have smart bulbs, thermostats, NAS drives, and workstations all humming along on our Wi-Fi. But here’s the reality: if you can’t see what’s on your network, you can’t secure it. Most people treat their home router like a “set it and forget it” appliance, but for those of us interested in cybersecurity and IT, that’s not enough.
Enter Nmap (Network Mapper).
Nmap is the undisputed industry standard for network discovery and security auditing. It’s been around for decades, it’s free, and it’s the first tool a professional reaches for during a penetration test. In this guide, we’re going to strip away the complexity and show you how to use Nmap to audit your home network, identify vulnerabilities, and take control of your digital perimeter.
1. Why Every Home Lab Needs Nmap
Before we touch the terminal, let’s talk about the “why.” Most “smart” home devices—the IoT (Internet of Things) category—are notoriously insecure. They often ship with hardcoded passwords, outdated Linux kernels, and open ports that don’t need to be open.
By learning Nmap, you aren’t just running a tool; you’re developing situational awareness. In my experience in EMS, situational awareness is the difference between a controlled scene and chaos. The same applies to your network. If you don’t know that your “smart” refrigerator is running an ancient version of an Apache web server, you’re leaving a back door open for anyone who knows how to knock.
2. Installation: Setting Up the Kit
Nmap is cross-platform, but how you install it matters for your workflow.
Windows & macOS
Head over to nmap.org and grab the binary installer.
Pro Tip: On Windows, the installer includes Npcap. This is the driver that allows Nmap to “sniff” packets. Ensure this is checked during installation.
macOS Users: If you use Homebrew (and you should if you’re into coding), just run: brew install nmap.
Linux: If you’re running Kali Linux, Nmap is already there. On Ubuntu or Debian, it’s a quick: sudo apt-get install nmap
Zenmap vs. CLI
The installer often includes Zenmap, the Graphical User Interface (GUI). While Zenmap is great for visualizing network topology (showing you a “map” of how devices connect), I highly recommend learning the CLI (Command Line Interface). In a professional environment, you won’t always have a GUI. Plus, the CLI is where the real speed and automation happen.
3. Understanding the “Big Sweep”: Your First Scan
Once installed, it’s time to see what’s actually happening on your Wi-Fi. We’ll start with a “Ping Sweep” to see who is alive, and then move into the heavy lifting.
Finding Your Target Range
You need to know your network’s IP range. On Windows, type ipconfig. On Mac/Linux, type ip addr or ifconfig. You’re looking for your IPv4 Address, likely something like 192.168.1.15.
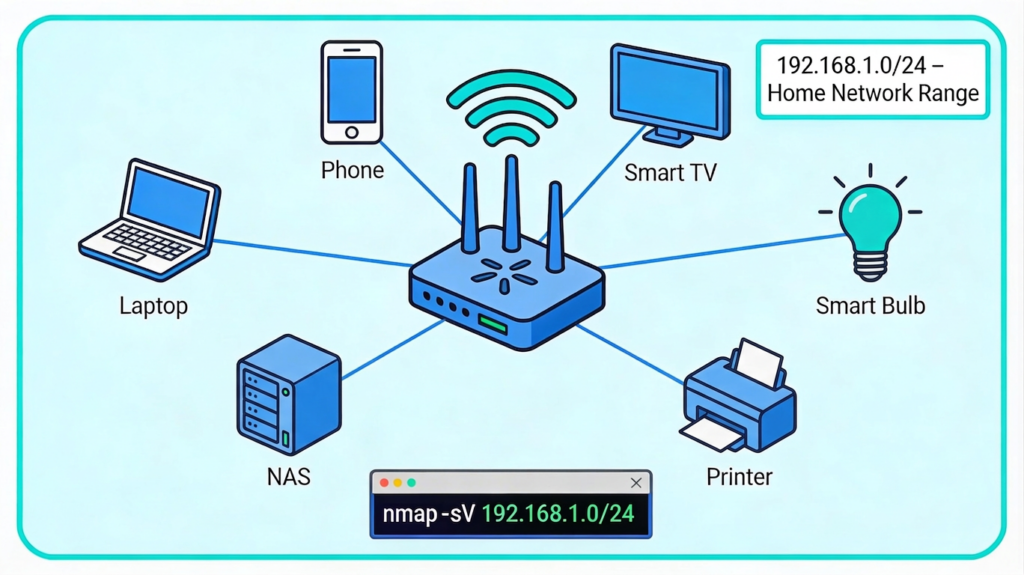
In Nmap, we use CIDR notation to scan the whole house. If your IP is 192.168.1.15, your network range is 192.168.1.0/24. The /24 tells Nmap to scan every address from .1 to .254
The “Bread and Butter” Command
Run this command in your terminal: nmap -sV 192.168.1.0/24
Let’s break down exactly what this does:
-sV (Service Version Detection): This is the most important flag for a beginner. A standard scan might tell you Port 80 is “Open.” Big deal. The -sV flag forces Nmap to communicate with that port to find out what is running there. It will return something like nginx 1.14.0 (Ubuntu). Now you have a specific version you can check against vulnerability databases.
The Range: This sweeps your entire home, from your laptop to your roommate’s phone and that forgotten smart plug in the garage.
4. Interpreting the Data: What Are You Looking For?
Nmap is going to spit out a lot of text. Don’t let it overwhelm you. Focus on these three pillars:
I. Device Inventory (The “Who”)
Every device has a MAC Address. Nmap will often try to resolve the manufacturer of the hardware. If you see “Shenzhen Haichuan Smart Device” and you don’t own any devices from that brand, you might have a neighbor on your Wi-Fi—or a compromised IoT device.
II. Port Status (The “How”)
Open: The device is actively listening for connections. This is normal for a web server, but weird for a lightbulb.
Closed: No application is listening, but the device is reachable.
Filtered: Nmap can’t tell if it’s open because a firewall (like the one built into Windows or your router) is blocking the probe.
III. Service Versions (The “Risk”)
This is where the -sV flag pays off. If you see an “FTP” service running on an old version (like vsftpd 2.3.4), you’ve found a major security hole. These older versions often have “Backdoors” or known exploits that allow someone to take over the device in seconds.
5. Advanced Techniques: Moving Beyond the Basics
Once you’re comfortable with -sV, you can start adding more “intel” to your scans.
OS Detection (-O)
Want to know if that device is running Android, Linux, or Windows? nmap -O 192.168.1.XX (Replace XX with a specific device IP) Nmap looks at how the device responds to certain packets—every operating system has a slightly different “fingerprint.”
Aggressive Scan (-A)
If you want the “kitchen sink” approach, use the aggressive flag: nmap -A 192.168.1.XX This combines OS detection, version detection, script scanning, and traceroute. It’s loud (meaning it’s easy for a firewall to detect), but for a home lab, it’s a goldmine of info.
6. The Ethics and Legality of Scanning
This is where we need to be very clear. Nmap is a dual-use tool. In the hands of a sysadmin, it’s a stethoscope. In the hands of a hacker, it’s a lockpick.
The Golden Rule: Never, under any circumstances, scan a network that you do not own or have explicit, written permission to audit.
Scanning your home Wi-Fi: Perfectly legal and encouraged.
Scanning Starbucks Wi-Fi: Gray area, likely against their Terms of Service, and could get you kicked out.
Scanning a random IP on the internet: Dangerous. Many ISPs and cloud providers (like AWS or Azure) monitor for Nmap scans and will blacklist your IP address or report you for “malicious activity.”
7. Deepening the Audit: Nmap + Wireshark
If Nmap is a “snapshot,” Wireshark is a “movie.”
Once Nmap tells you that Port 80 (HTTP) is open on a device, you can use Wireshark to “sniff” the traffic going to that port. If you see your username and password being sent in Cleartext (plain English), you know that device is a massive security risk. This “one-two punch” of Nmap for discovery and Wireshark for analysis is how professional security researchers work.
8. Leveling Up: Practice in a Virtual Lab. If you’re worried about crashing your home router (it happens with older hardware if you scan too aggressively), build a Virtual Lab. Install VirtualBox.
Download a “vulnerable” VM like Metasploitable 2. Set the Network Adapter to “Host-Only” or “Internal Network.”Practice scanning the Metasploitable VM. This gives you a target that is designed to be full of holes, allowing you to see what a “bad” scan result looks like without putting your actual personal data at risk.
9. Conclusion: The Distonic Mindset. At the end of the day, Nmap is about transparency. We live in an era where software is a black box. Nmap allows you to peek inside that box and see what your devices are actually doing.For the beginners out there: don’t get hung up on memorizing every single flag (there are hundreds). Master -sV, understand CIDR notation, and always—always—be ethical. Whether you’re aiming for a career in cybersecurity or just want to make sure your home network is a fortress, Nmap is the first step on that journey. Keep scanning, keep learning, and stay secure.